On-Account
Contents: This guide will show you how to access the On-Account feature that NovaDine offers, which allows you the option of extending credit to certain customers.
On-Account Overview
There are 2 available roles for On-Account:
- On-Account Admin: Create and view customer accounts, modify spending limits and accept payments
- On-Account Manager: View customer accounts and accept payments
Create an Account
You are able to create accounts with a House Account Admin login. Accounts can only be created for existing users. If you are unable to locate a user, the customer will need to be registered through the site. Accounts are limited to one per email address.
Log into the site with your House Account Admin login
Click “Manage” from the top right menu

Proceed to the “Customers” tab

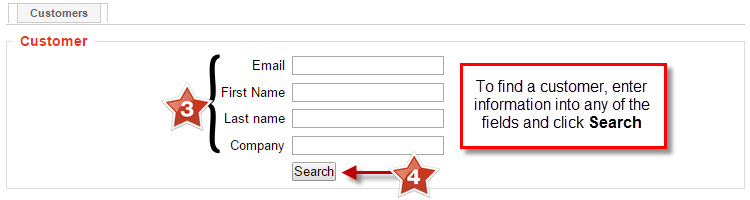
Enter any information that you have about the customer
Click “Search”

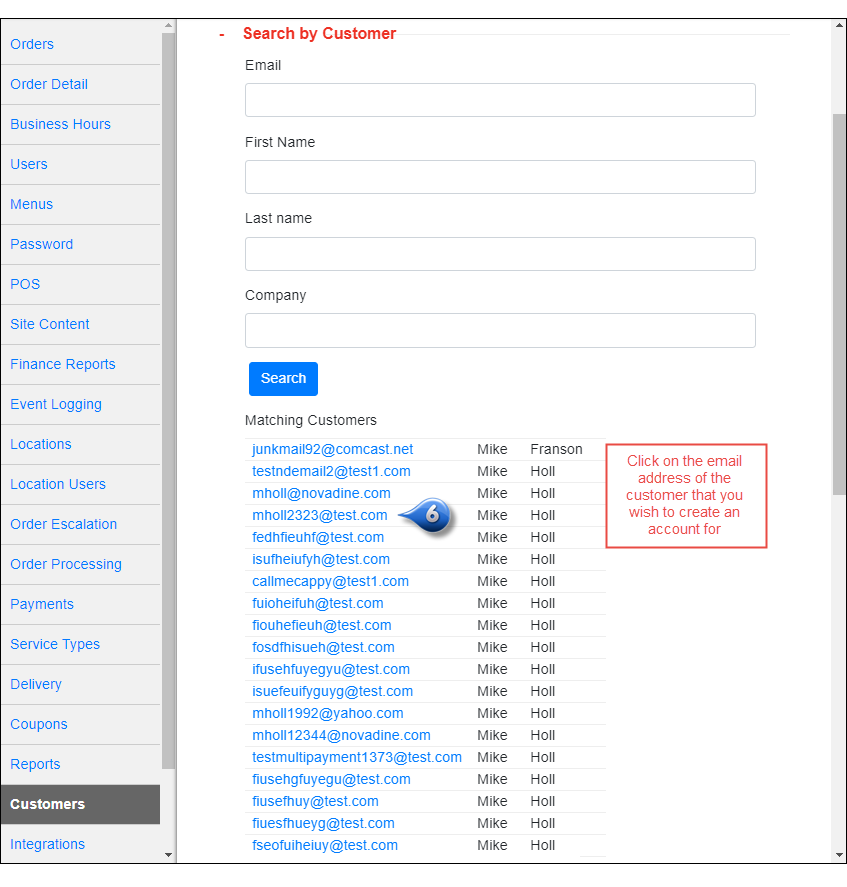
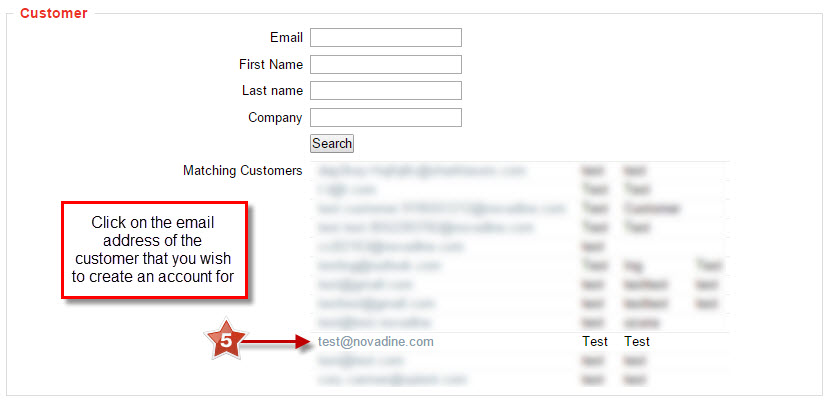
Click on the email address of the customer
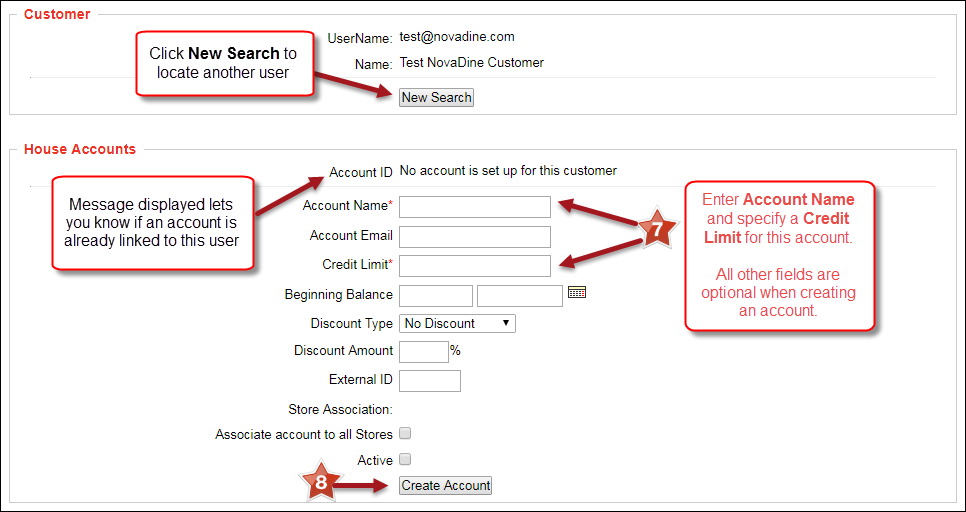
Enter the following information to create a new account for this customer:
- Account Name: optional field that is associated with the new account (i.e., company name)
- Credit Limit: spending limit for the customer, which are chosen from a dropdown of pre-defined amounts in the database
Click “Create Account”
Modify Spending Limits
You are able to increase or decrease a customer’s spending limit using an On-Account Admin login. Spending limit amounts are pre-defined in the database per chain.
To increase or decrease spending limits:
Log into the site with your On-Account Admin login
Click “Manage” from the top right menu
Enter any information that you have about the customer
Click “Search”
Click on the email address of the customer
Under the On-Account section, select a credit limit amount from the drop down menu
Click “Update Account”

Accept Payments
You are able to post payments made using the Add On-Account Payments section of the customer account using an On-Account Admin or On-Account Manager login.
Available payment methods are:
- Check
- Credit Card
- Write-Off
To enter an On-Account Payment:
Log into the site with your On-Account Admin login
Click “Manage” from the top right menu
Enter any information that you have about the customer
Click “Search”
Click on the email address of the customer
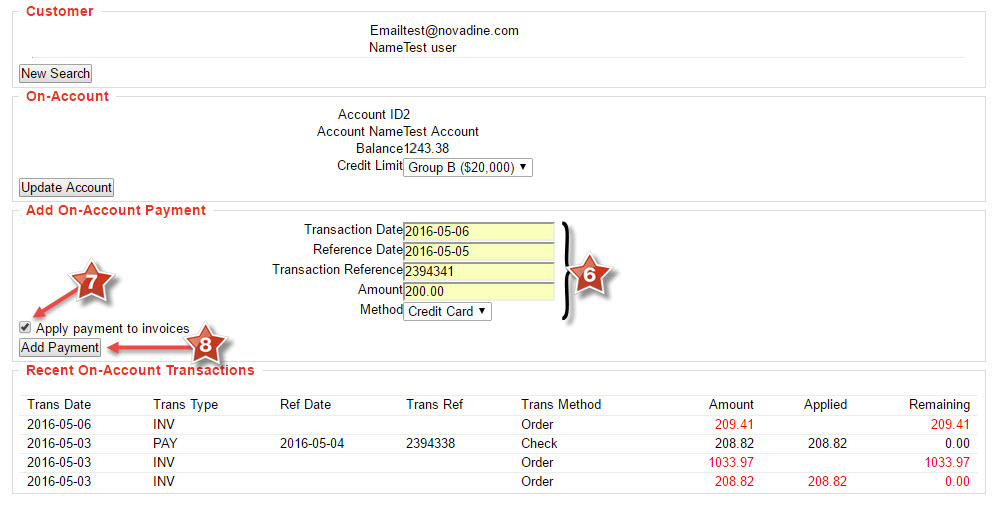
Enter the transaction details
Check the ‘Apply payment to invoices’, if you wish to apply the payment to a specific order(s)
Click “Add Payment”
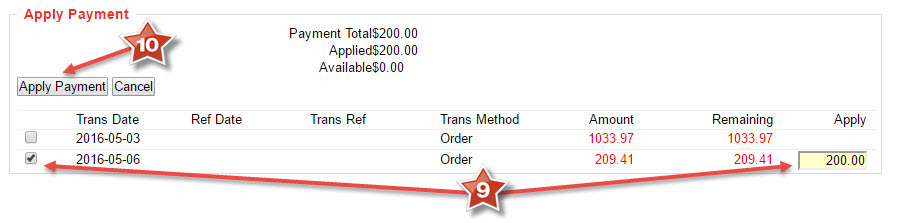
At the ‘Apply Payment’ screen, you will need choose which Invoice(s) to apply the payment to by enabling the checkbox next to the appropriate order and entering the amount of payment to be applied to that specific invoice. There may be multiple invoices paid from one payment
Click ‘Apply Payment’
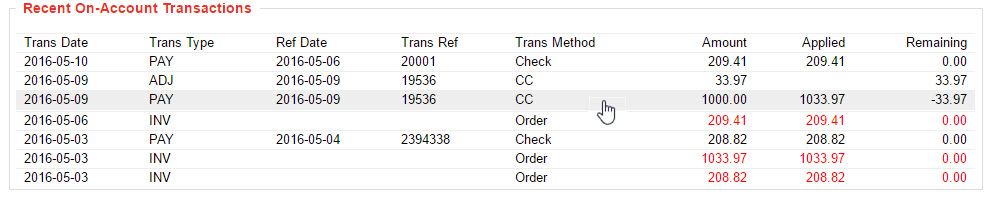
Payment will now show under Recent On-Account Transactions in both the payment row and the row of the invoice(s) that the payment was applied to. It will also show any remaining balance or credits for a particular order

Edit Payment
To edit a payment, simply click on the appropriate payment in the Recent On-Account Transactions section
Write-Offs
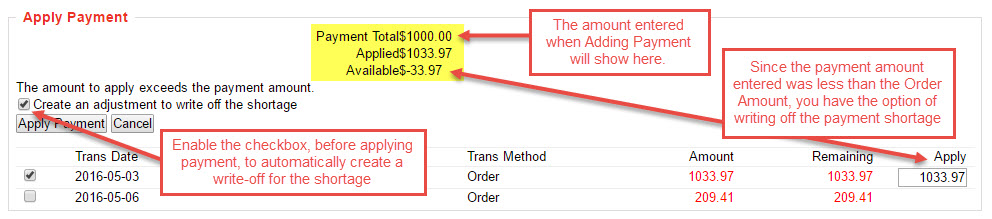
For underpayments, you will have the ability to write-off any payment shortage with an adjustment or show an outstanding balance on the transactions screen
Enter the payment details (actual payment amount) and amount in the Add On-Account Payment section
Check the ‘Apply payment to invoices’, if you wish to apply the payment to a specific order(s)
Click “Add Payment”
To add payment and write off the remaining balance as an adjustment, enter the full invoice amount - this will create an entry for the amount of the actual payment along wtih a write-off adjustment entry for the shortage
You will receive a message at the top of the page stating, ‘The amount to apply exceeds the payment amount.’
Enable the checkbox next to ‘Create an adjustment to write off the shortage’ in order to automatically create an adjustment entry to write off the remaining balance
Once returned to the Recent On-Account Transactions, you will see the payment applied to the appropriate order, along with the adjustment entry
