Catering Editor
Contents: This guide will show you how to access the Catering Editor, where you can create and manage packing lists
Catering Editor Overview
Packing Lists can be used for Catering and Delivery orders to ensure that all items are included and packaged correctly. The Packing List serves as a checklist for your staff and will contain menu items ordered and the components you have setup to be included for each item.
This guide will show you the following:
Accessing the Catering Editor
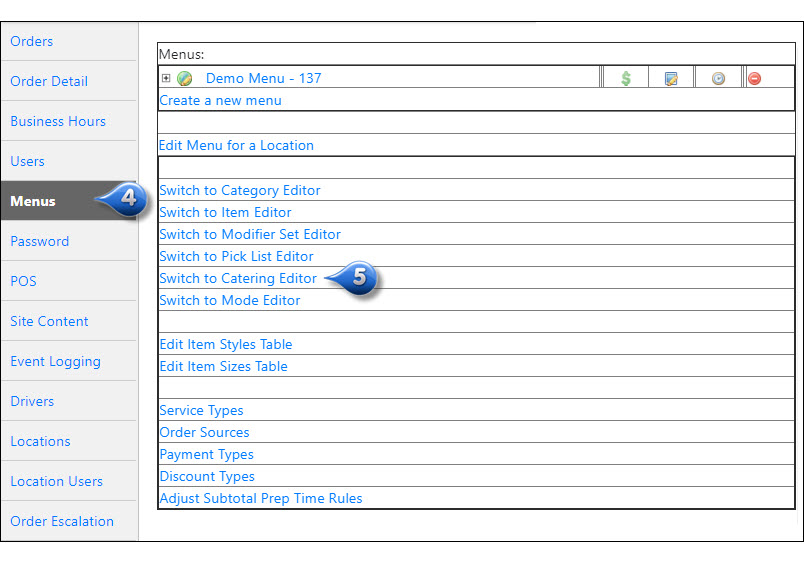
To access the Catering Editor, proceed to your online ordering website and follow the below steps:
Click the
 icon in the top right corner of your site
Login with your management account credentials
Click the
 icon in the top right corner that displays after successful login, which will open your Backend Management site in a new tab
On the newly opened Management Tab, click on the Menus Tab
Click Switch to Catering Editor link
Note
If you do not have an account with management access, please register as a customer and ask your NovaDine Rep to upgrade your account
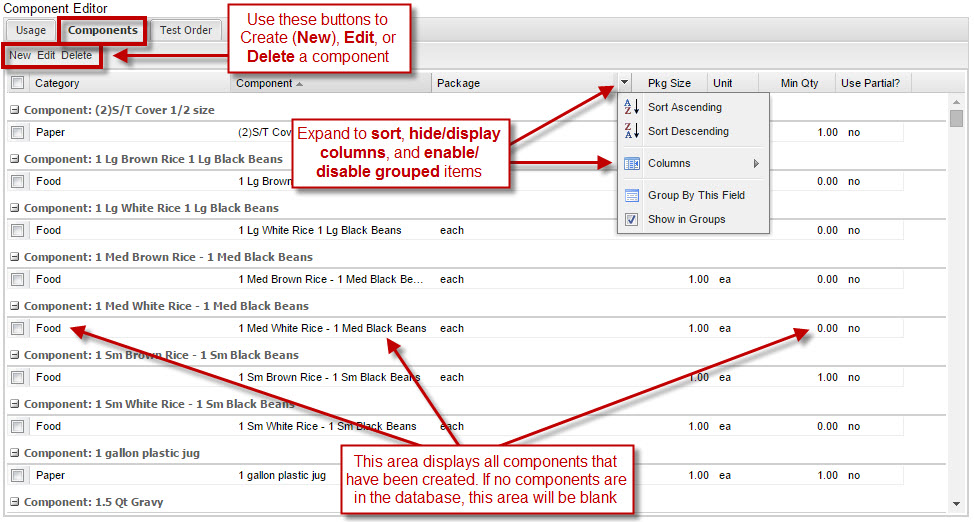
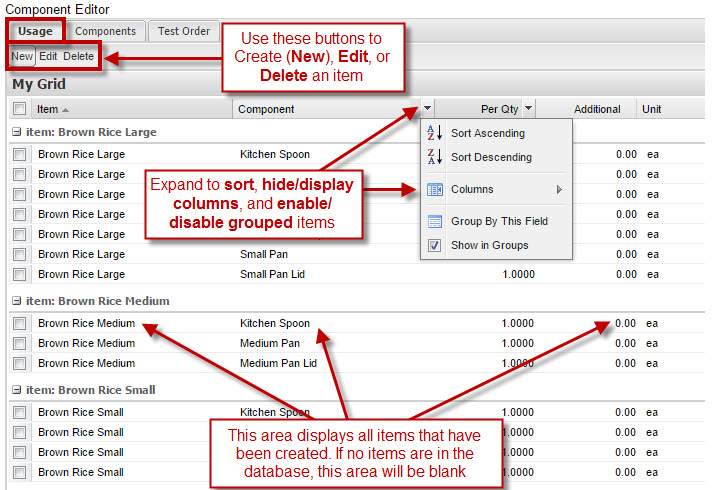
Components Tab
Each item offered for catering and/or delivery needs to have corresponding components added to make up the packing list
| Example: | To prepare a Catering Party Pack for 15 for a catering order, the expeditor must put together the following: 15 Party Plates, 15 Cutlery Sets, 6 Soup Spoons, 1 Serving Spoon, 1 Ladle, 3 Tongs, 1 Catering bag. |
|---|
Overview
Creating Components
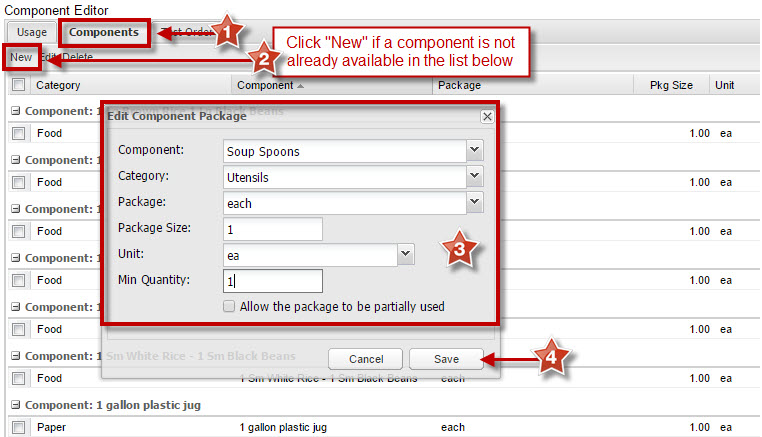
To create a component:
Click the Components Tab
Click “New”
Fill in the below fields to create a component:
- Component: the name of the component (e.g., 10oz. container, serving spoon, sour cream)
- Category: the component category (e.g., utensils, food, paper)
- Package: the container type (e.g., bag, 20 pack, each)
- Package Size: with unit, gives the size of the package (e.g., for a 16oz. container, the package size would be 16 and the unit would be oz.)
- Unit: the unit of measurement (e.g., for a 16oz. container, the package size would be 16 and the unit would be oz.)
- Min Quantity: minimum quantity of the component
- If the components packaging can be broken up, enable the checkbox. If not, leave blank
Click “Save”
Usage Tab
Now that you have created your components, you must attach your components to a menu item and create the packing list
Overview
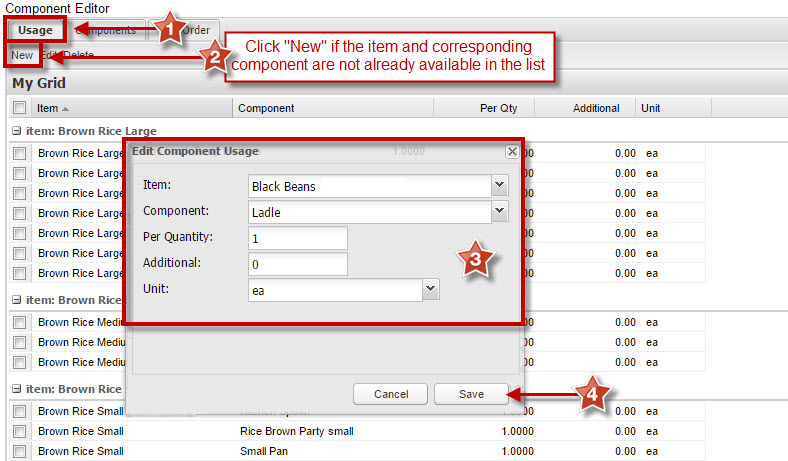
Attaching Components to Items
To assign a component to an item:
Click the Usage Tab
Click “New”
Fill in the below fields to create an item:
- Item: select the item by using the drop down arrow. The list displayed will be items from your menu
- Component: select the component by using the drop down arrow. The list displayed will be from the components tab
- Per Quantity: the quantity required per item
- Additional: any amount to include in addition to the ‘Per Quantity’ field (e.g., if you have an order for 10 people you may want to include additional plates, forks, napkins, etc.)
- Unit: select the unit using the drop down arrow
Click “Save”
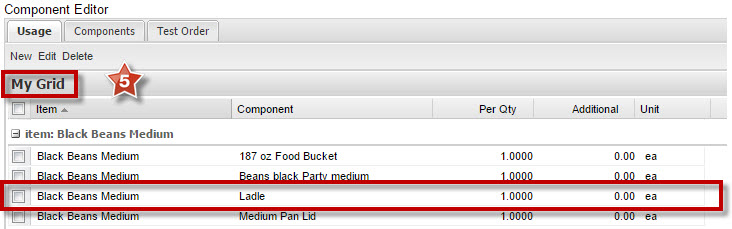
The assigned component is now visible next to the item under ‘My Grid’
Search Existing Items and Components
Once you have started using the catering editor, items and categories will accumulate. The following organization tools will help you change the grouping of the information within the tab pages. This can prevent adding multiples of components and assigned components
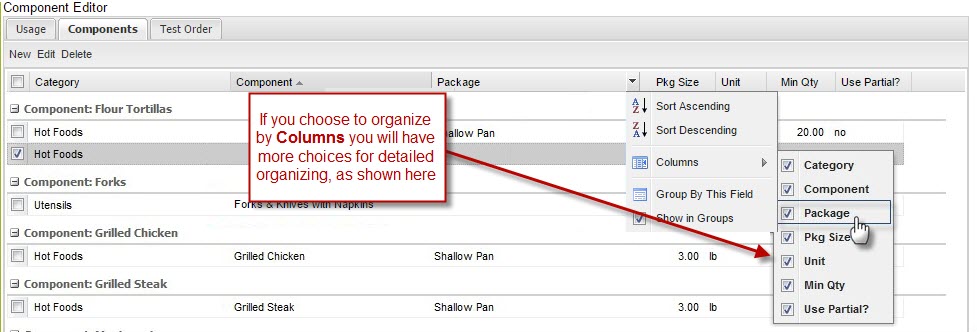
Point your mouse on the column headings and double click one of the column names (Item, Component, Per Qty, Additional or Unit) to view a dropdown menu of sorting options. Use the arrow to choose your option from the list
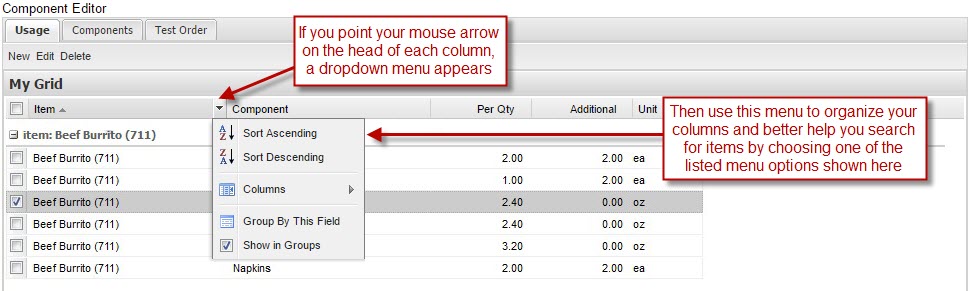
The Components work in the same manor. If you choose “Columns” from the dropdown menu a second option list appears
Edit Existing Components
Once you have created a component or assigned a component to an item you can edit these at any time to adjust, as needed
Edit a Component
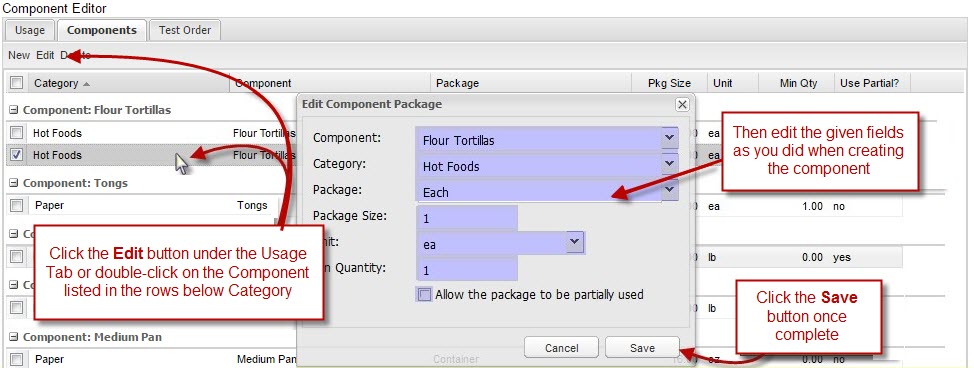
To edit your components:
Click “Edit” or double click on the category name
Update the information in the fields, as needed
Click “Save”
Edit a Component Attached to an Item
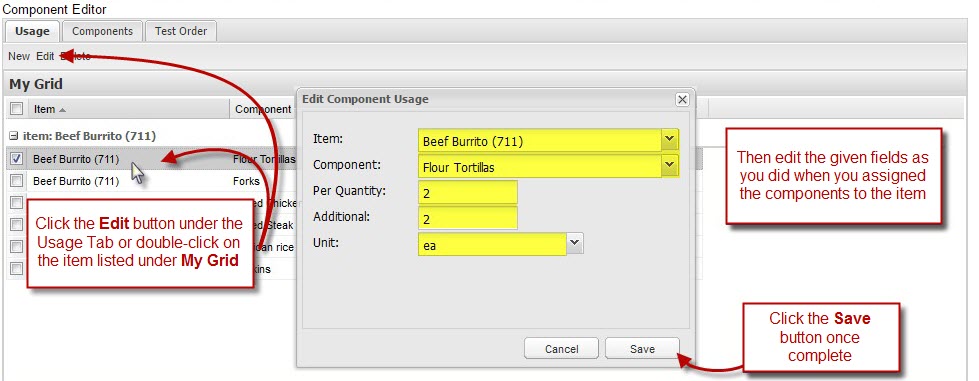
To edit components that are assigned to an item:
Click “Edit” or double click on the item name under My Grid
Update the information in the fields, as needed
Click “Save”
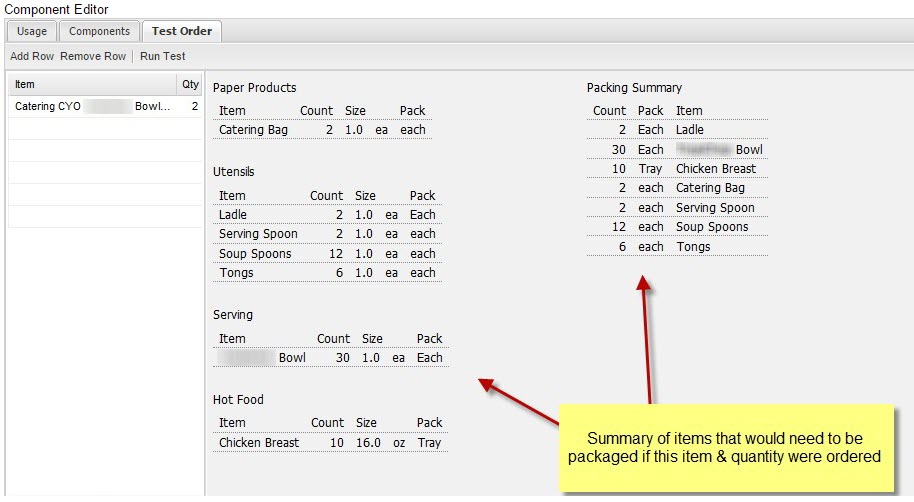
Place a Test Order
After you make any updates or assign components to an item, run a test order. This allows you to test the item and component relationships that you have created and confirm that all of your calculations are correct.
Click the Test Order Tab
Click in the space below the Item column and use the drop down data field to type in or choose an item from the list
Click in the space below the Qty column and enter a quantity
Click “Run Test” when finished
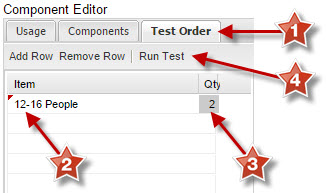
Results of running a Test Order shown below