Local Menu
Contents: This guide will show you how to access a specific store’s menu, where you have the ability to manage menu items and local prices.
Local Menu for Users with Corporate Manager or Higher Access
Use the links below to jump right to specific sections of the guide with Corporate Manager Level Access or higher:
- Accessing the Local Menu with Corporate Level Access or Higher
- Assign Menu to a Location
- Activate/deactivate a Local Menu
- Local Menu Hours
- Edit Menu Hours for a Location for a Specific Date
- Close Location for a Specific Date
- Enable/Disable Item at Local Level
- Local Level Pricing
- Third Party Delivery Pricing
Accessing your Local Menu
To access the menu for a specific location:
Click the
 icon in the top right corner of your site
Login with your management account credentials
Click the
 icon in the top right corner that displays after successful login, which will open your Backend Management site in a new tab
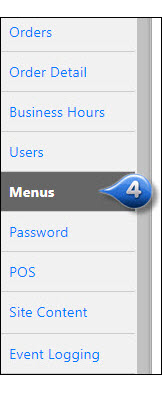
On the newly opened Management Tab, click on the Menus Tab
Depending upon your Management access level, you will see one of the following screens:
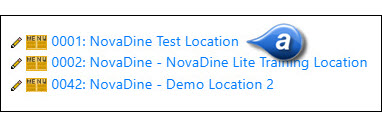
- If you have store manager access and manage more than one location, you will need to click the
 next to the store number you wish to access
- If you have store manager access and only manage one location, you may skip to step 6
- If you have store manager access and manage more than one location, you will need to click the
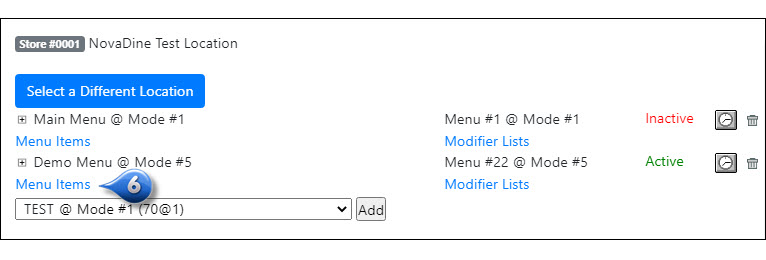
To access your items, click Menu Items under the menu you wish to view or edit
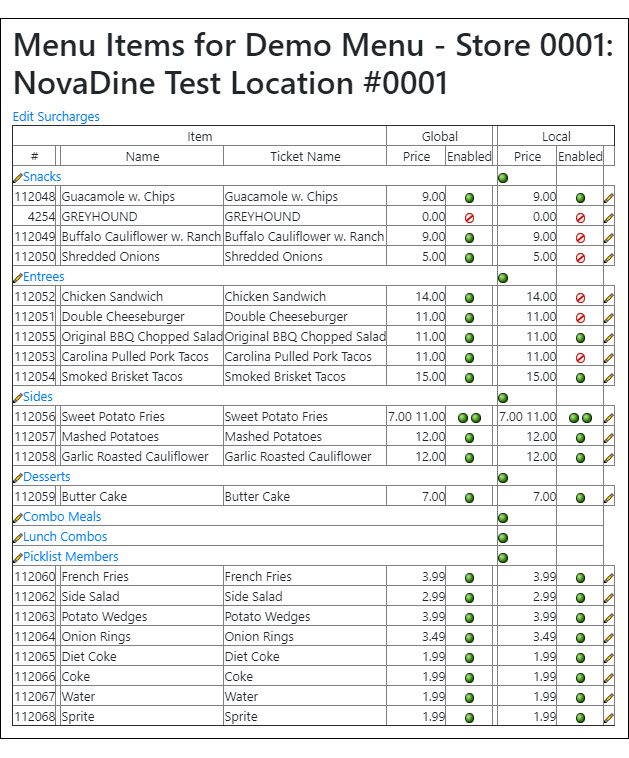
This is your store’s menu page. All of your store’s available items will be displayed here, grouped by categories, along with item name, menu availability, global pricing and your local, store specific pricing
Note
If you do not have an account with management access, please register as a customer and ask your NovaDine Rep to upgrade your account
Enable or Disable a Local Item
Your menu shows all items that are available at the global level. Some items might be listed on your menu that your location does not offer, or you run out of a particular item and wish to hide it from the customer on the front end. To do this, you would need to disable the item on your store menu:
Click Menu Items under the menu you wish to edit

Mark an item as disabled for the store by clicking the
 button (turning it red/disabled - will not display on front end for ordering)
Mark an item as enabled for the store by clicking the
 button (turning it green/enabled - making it available for online ordering at this location)
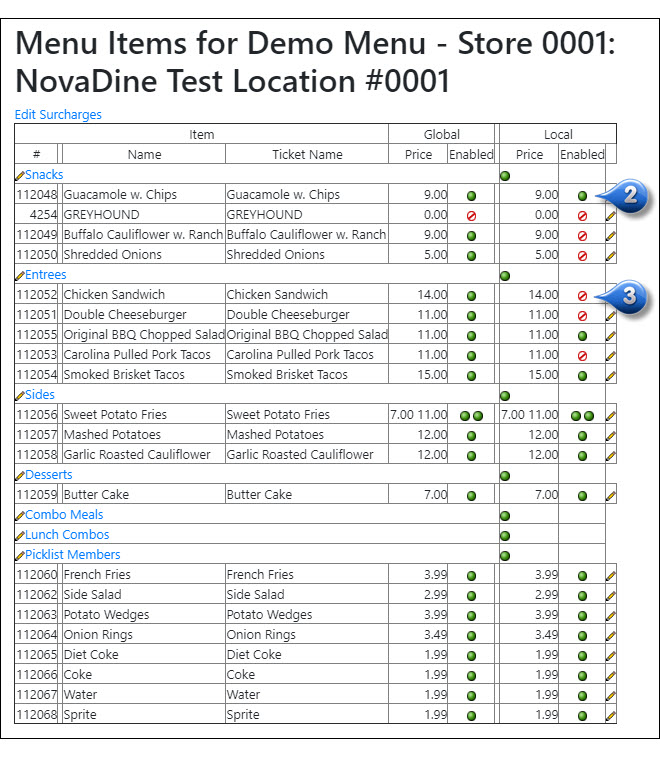
Note
If your location is POS integrated, item availability will be updated via local-level menu imports and should be managed in the store’s POS.
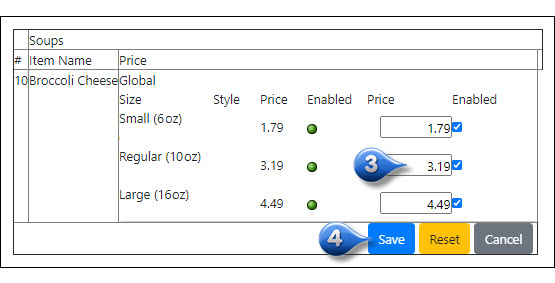
Edit Local Item Pricing
To edit individual local item pricing:
Click Menu Items under the menu you wish to edit
Click the
 to the far right of the item that you wish to edit
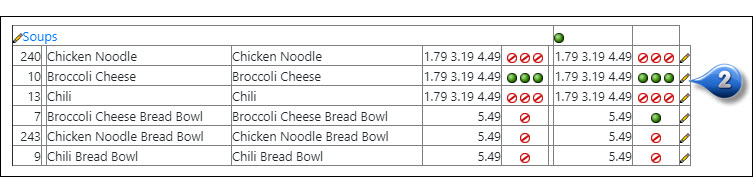
This configuration screen will show you the sizes and styles in which this item is available, status of the item (enabled or disabled), and the local item pricing. Update the item pricing for each size and/or style, as needed
Click Save
Note
If your location is POS integrated, item pricing will be updated via local-level menu imports and should be managed in the store’s POS.
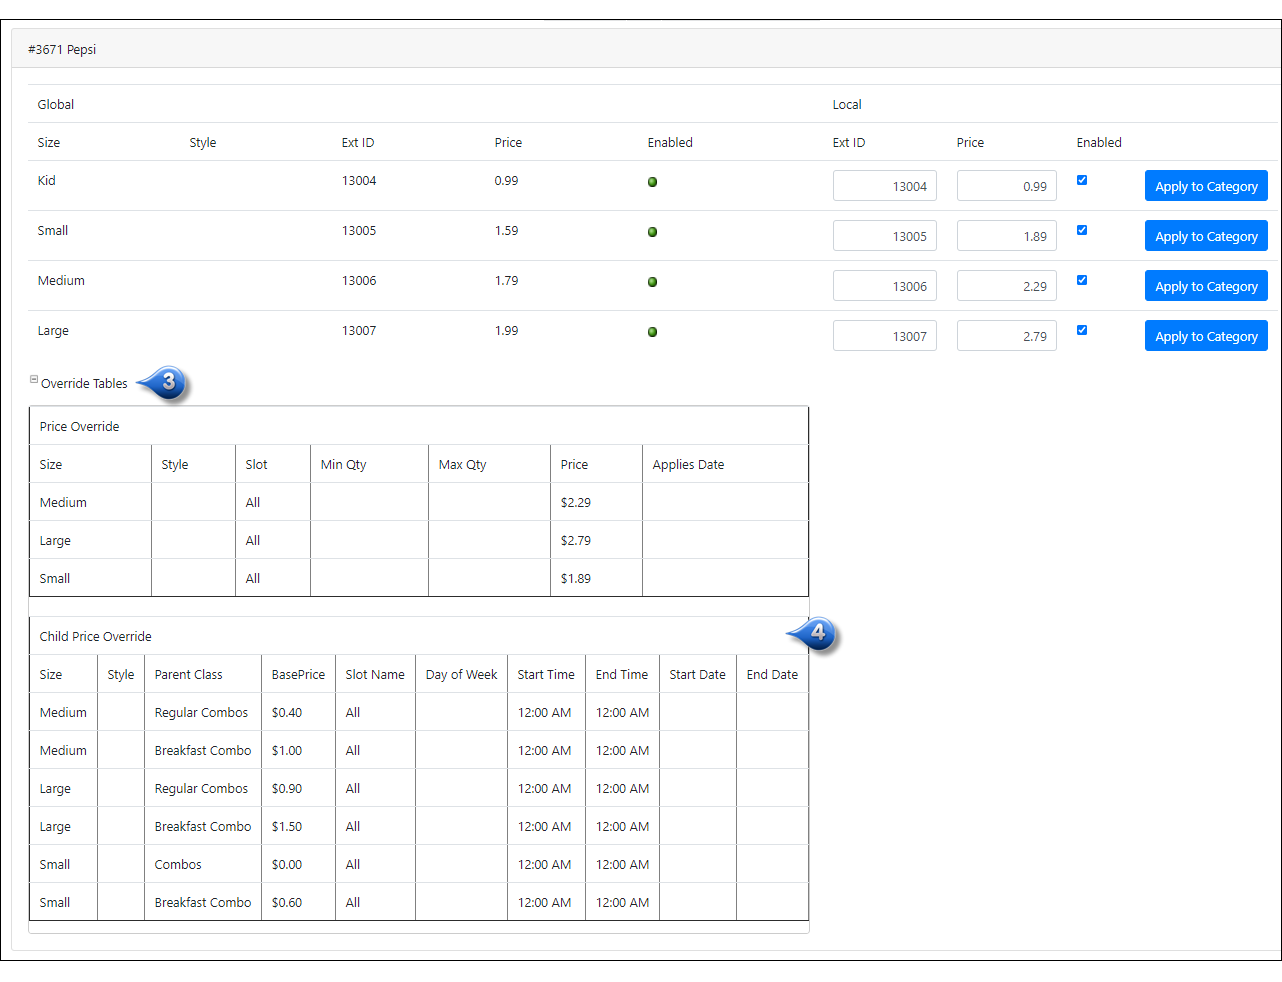
View Child Pricing Rules
To view child pricing rules:
Click Menu Items under the menu you wish to edit
Click the
to the far right of the item that you wish to edit or to the left of the category name to view all items in that categoryClick the
 to Show/Hide override tables
Your child pricing rules will display below
Note
If your location is POS integrated, child pricing will be updated via local-level menu imports and should be managed in the store’s POS
Edit Local Pricing by Category
To edit pricing for all items in a category from one screen:
Click Menu Items under the menu you wish to edit
Click the
to the left of the category name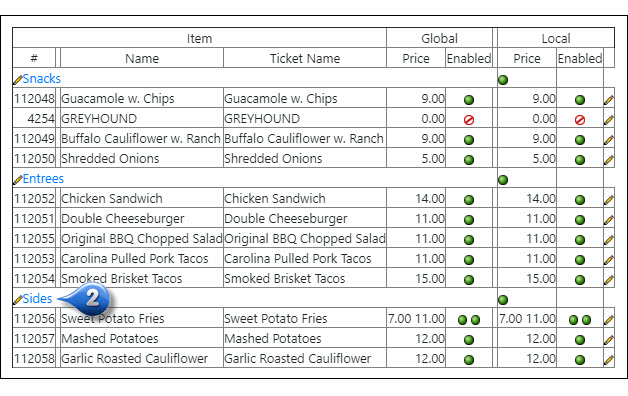
This configuration screen will show you the sizes and styles in which the items are available, status of the items (enabled or disabled), and the local pricing for all items in the selected category. Update pricing for each item, including size and/or style, as needed
Click Save

Note
If your location is POS integrated, item pricing will be updated via local-level menu imports and should be managed in the store’s POS.
Modifiers (Non-POS Locations only)
When a customer places an order, they have choices to make when selecting certain items. What kind of bread would they like? Would they like their sandwich toasted? For non-POS locations, these are called Modifiers.
Accessing your Modifiers (Non-POS Locations only)
To access your modifiers:
Click Modifier Lists under the appropriate menu
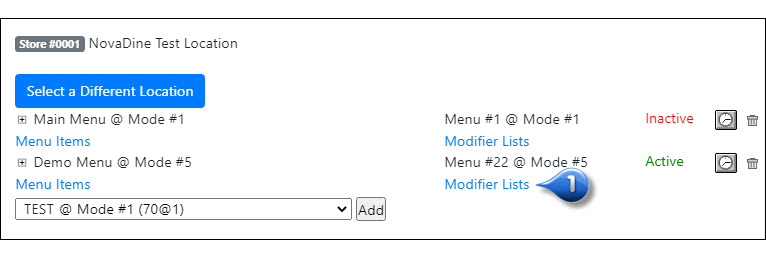
This will pull up your store’s modifiers page. All of your store’s available modifiers, grouped by prompts, will be displayed here, along with modifier name, availability, global pricing and your local, store specific pricing
Enable or Disable a Modifier (Non-POS Locations only)
Click Modifier Lists under the appropriate menu
Enable a currently disabled modifier by clicking the local
button (turning it red/disabled - will not display on front end for ordering at this location)Disable a currently enabled modifier by clicking the local
button (turning it green/enabled - making it available for online ordering at this location)
Edit Local Modifier Pricing (Non-POS Locations only)
Click Modifier Lists under the appropriate menu
Click the
to the left of the prompt name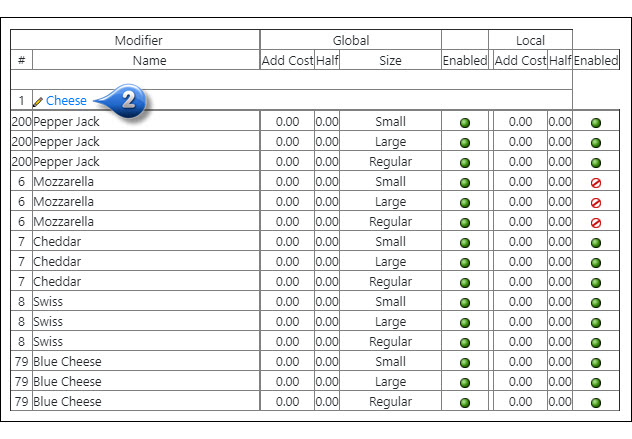
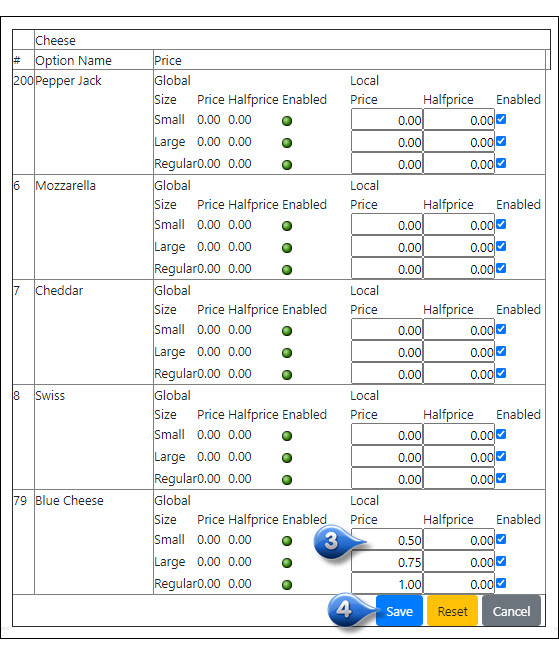
This configuration screen will show you the sizes and styles in which the modifiers are available, status (enabled or disabled), and the local pricing for all modifiers available in the selected prompt. Update pricing for each modifier, including size and/or style, as needed
Click Save
Note
If you have an item listed in two modifier lists, you will need to update each one individually
Accessing the Local Menu with Corporate Level Access or Higher
To access the menu for a specific location:
Click the
icon in the top right corner of your siteLogin with your management account credentials
Click the
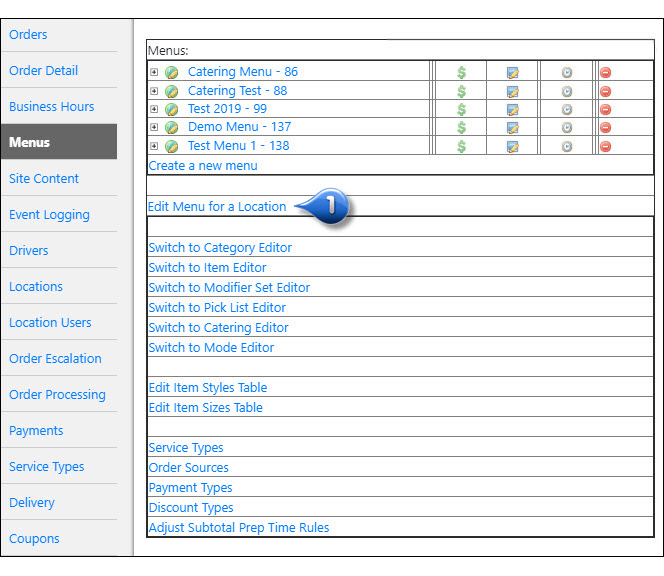
icon in the top right corner that displays after successful login, which will open your Backend Management site in a new tabOn the newly opened Management Tab, click on the Menus Tab
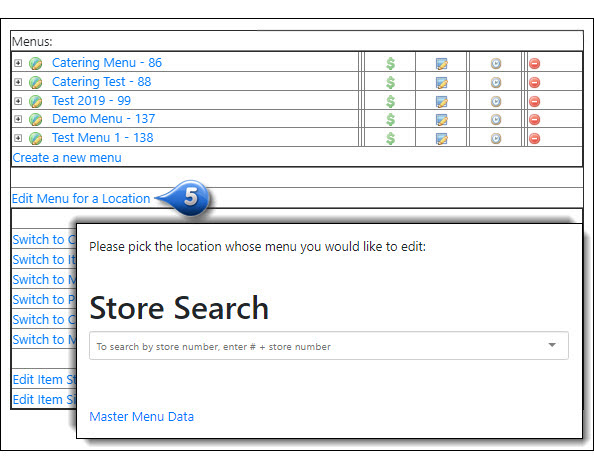
Select the Edit Menu for a Location link and choose a store from the store search
To access your items, click Menu Items under the menu you wish to view or edit
Assign Menu to a Location
A store needs to have a menu assigned to it in order for customers to order online. To assign a menu to a specific location:
From the Menus Tab, click the Edit Menu for a Location link
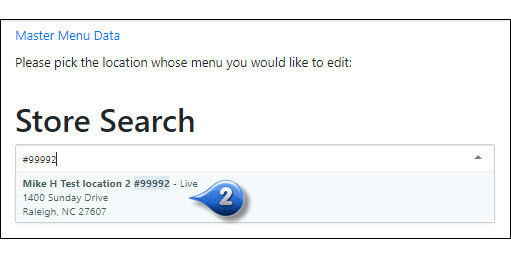
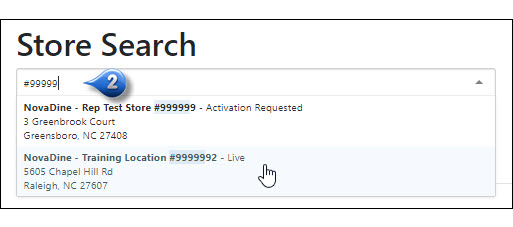
Enter the store number for the location in the Store Search box and select the desired location
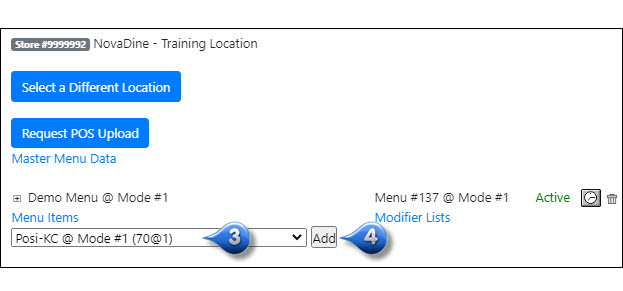
Select the appropriate menu and mode combination from the dropdown
Click Add
Note
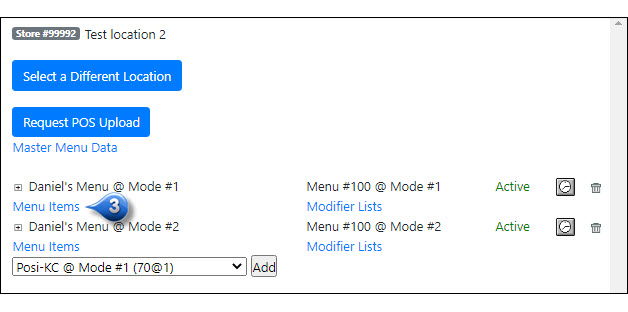
If you previously selected a store, step 2 will not be necessary, as you will be taken to that store’s menu page. To select an alternate store, click Select a Different Location at the top of the screen
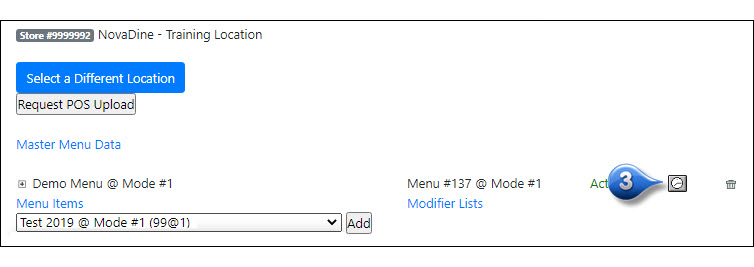
Activate/deactivate a Local Menu
From the Menus Tab, click the Edit Menu for a Location link
Enter the store number for the location in the Store Search box and select the desired location
To the right of each menu is the Menu ID and the Mode ID that is assigned to the location
Click the status to change it (if you click Active it will change the status to Inactive and vice-versa)
Local Menu Hours
From the Menus Tab, click the Edit Menu for a Location link
Enter the store number for the location in the Store Search box and select the desired location
Click the |clock1| to the right of the menu name
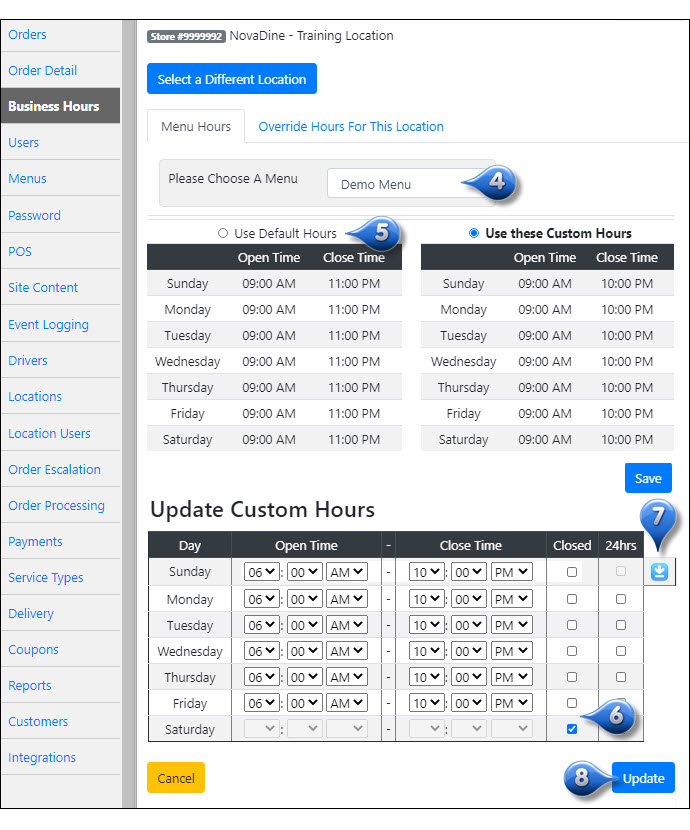
Select the menu that you wish to update the hours for from the dropdown
You can choose to use the default menu hours or customize your hours and select the appropriate radio button. If you choose the default menu hours, skip to step 8
Update the menu hours for each day of the week by choosing the open and close time from the appropriate drop downs. If the menu will be unavailable on specific days of the week, check the Closed box next to appropriate day
If the menu will have the same hours for each day, simply enter the hours in the first row and click the blue down arrow to copy the hours to the below days
Click Update to save your changes
Note
Local menu hours can also easily be updated via the ‘Business Hours’ tab in back-end management. Please refer to Business Hours for more information.
Edit Menu Hours for a Location for a Specific Date
From the Menus Tab, click the Edit Menu for a Location link
Enter the store number for the location in the Store Search box and select the desired location
Click the |clock1| to the right of the menu name
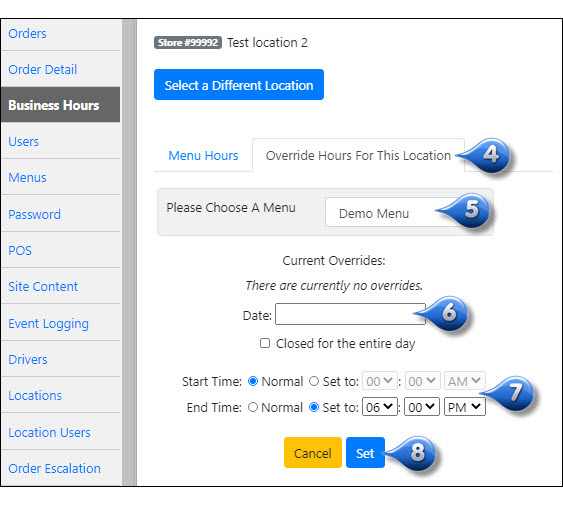
Under the Override Hours for this Location subtab, you have the option to temporarily change your menu’s opening and/or closing hours for a specific date
Choose the Menu that you wish to override hours for from the Please Choose A Menu dropdown
Choose the date from the Calendar dropdown in the Date field
Choose the radio button next to Start Time and choose Set to to change your opening time and/or End Time to change your menu hours
Click Set
If you wish to edit hours for more than one day, repeat the above process for each menu that will need the override hours
Close Location for a Specific Date
From the Menus Tab, click the Edit Menu for a Location link
Enter the store number for the location in the Store Search box and select the desired location
Click the |clock1| to the right of the menu name
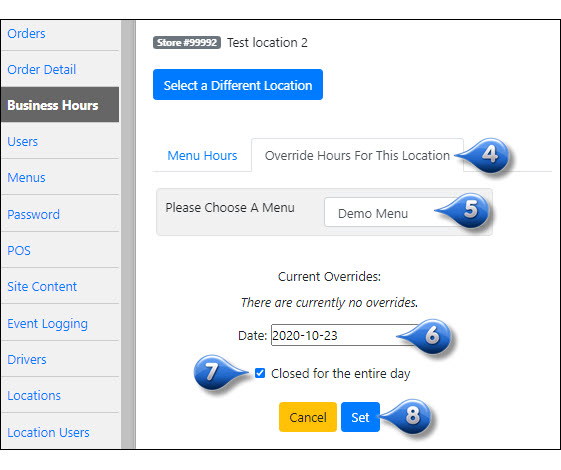
Under the Override Hours for this Location subtab, you have the option to temporarily change your menu’s opening and/or closing hours for a specific date
Choose the Menu that you wish to override hours for from the Please Choose A Menu dropdown
Choose the date from the Calendar dropdown in the Date field
Check the Closed for the entire day box
Click Set
If you wish to mark a location as closed for more than one day, repeat the above process for each day that the menu hours will differ
Enable/Disable Item at Local Level
To enable or disable an item at the store level:
From the Menus Tab, click the Edit Menu for a Location link
Enter the store number for the location in the Store Search box and select the desired location
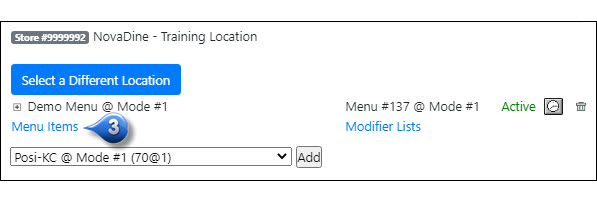
Click the Menu Items link below the menu that contains the item you wish to enable/disable
Edit item availability for the store by clicking the
button under the Local section to deactivate the item (turning it red/disabled - hiding it from the front end for ordering), or clicking the button to activate the item (turning it green/enabled - making it available online for ordering at this location)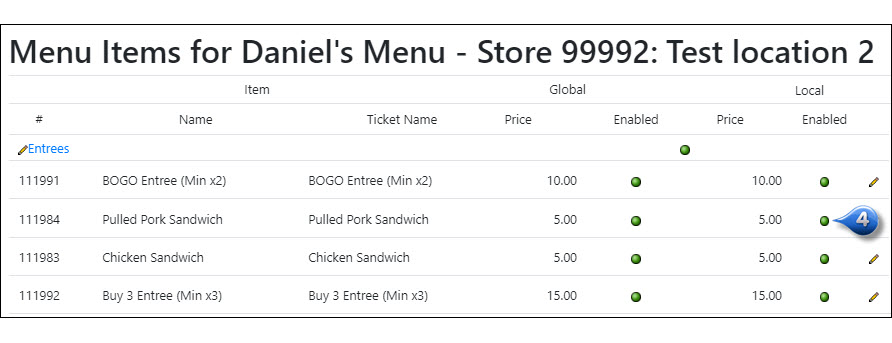
Local Level Pricing
To edit pricing for a specific location:
From the Menus Tab, click the Edit Menu for a Location link
Enter the store number for the location in the Store Search box and select from the dropdown
Click the + to the left of the menu to drilldown
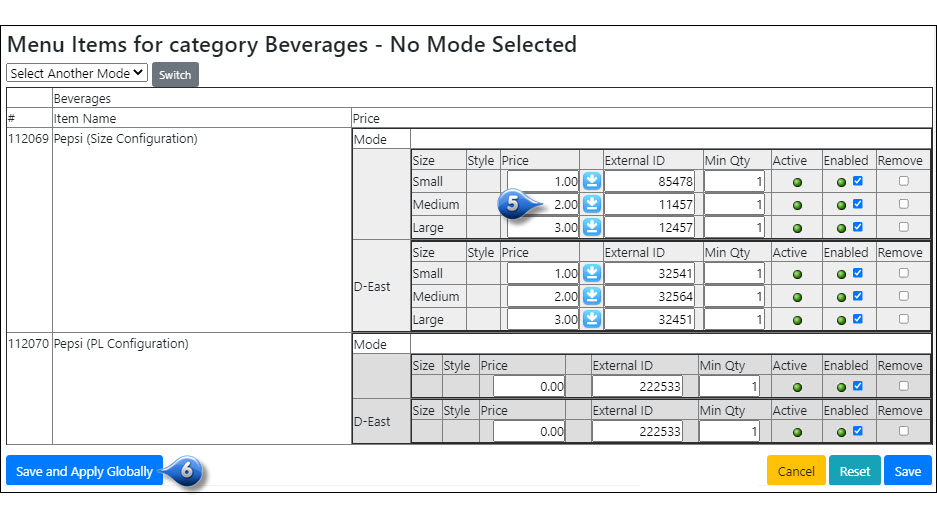
Click the |dollar| next to the category or item that you wish to edit pricing for
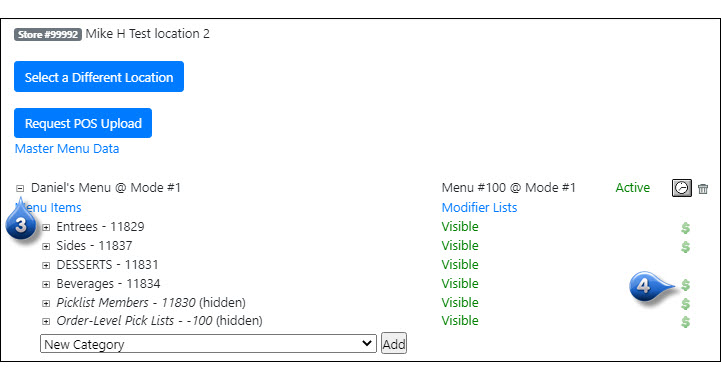
Edit pricing, as needed
Click Save to save in the selected mode or Save and apply globally to apply pricing to all modes
Third Party Delivery Pricing
To update the surcharges on your menu pricing for the third party delivery companies, follow the below steps:
From the Menus Tab, click the Edit Menu for a Location link
If a store is not selected, enter the store number for the location in the Store Search box and select from the dropdown.
Click the Menu Items link for the menu you wish to access
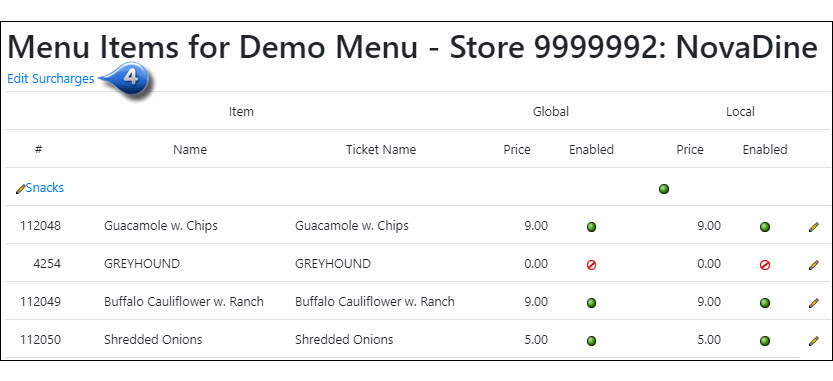
On the local menu screen, click the Edit Surcharges link directly below the menu name
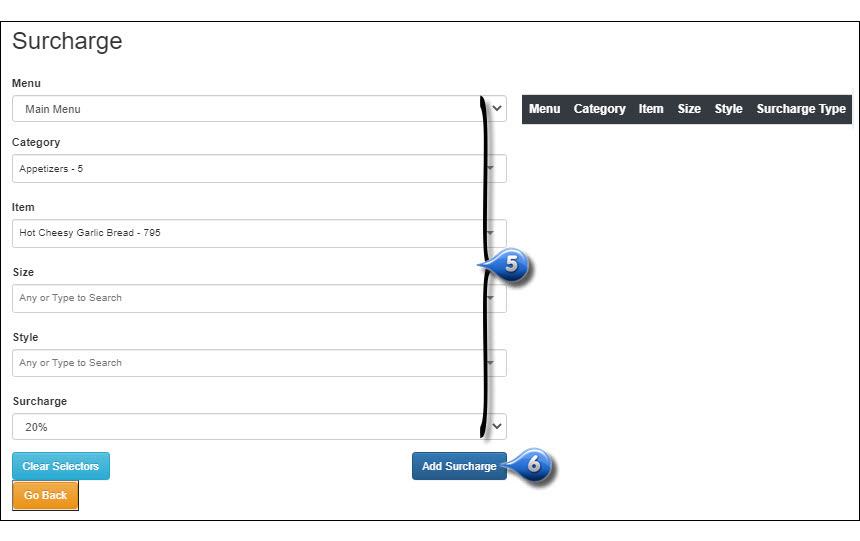
Select the appropriate menu, category, item, and/or size/style, as needed, along with the appropriate surcharge
Click Add Surcharge
Repeat the above steps for any categories or items that you wish to update the surcharge on
Note
You must provide the surcharge dollar amounts or percentages that you wish to show up as options to NovaDine to upload before they will be available in the dropdown.